Growing mushrooms in plastic buckets is one of the easiest, most beginner-friendly methods for DIY mushroom cultivation at home. This complete guide will walk you through everything from selecting the best mushroom varieties to troubleshooting common pitfalls, all while optimizing for indoor or outdoor setups. Whether you’re a novice gardener or an experienced homesteader, bucket mushroom growing allows you to harvest fresh, nutritious fungi like oyster mushrooms right from your kitchen or garage. With minimal investment and space, you can produce multiple flushes of mushrooms year-round, turning your plastic buckets into productive mini-farms.
Benefits of Growing Mushrooms in Plastic Buckets
Why choose plastic buckets for mushroom cultivation? This method, often called the “bucket tek,” stands out for its simplicity, affordability, and scalability. Unlike traditional log or bed growing, buckets provide a controlled environment that’s perfect for urban dwellers or those with limited space.
- Ease for Beginners: No advanced equipment needed—just a clean 5-gallon bucket, spawn, and substrate. Colonization happens in 10-21 days, with fruits ready in under two weeks.
- Cost-Effective: Start for under $50 per bucket, yielding 1-3 pounds of mushrooms per flush. Reusable buckets reduce waste, and spent substrate can enrich your garden soil.
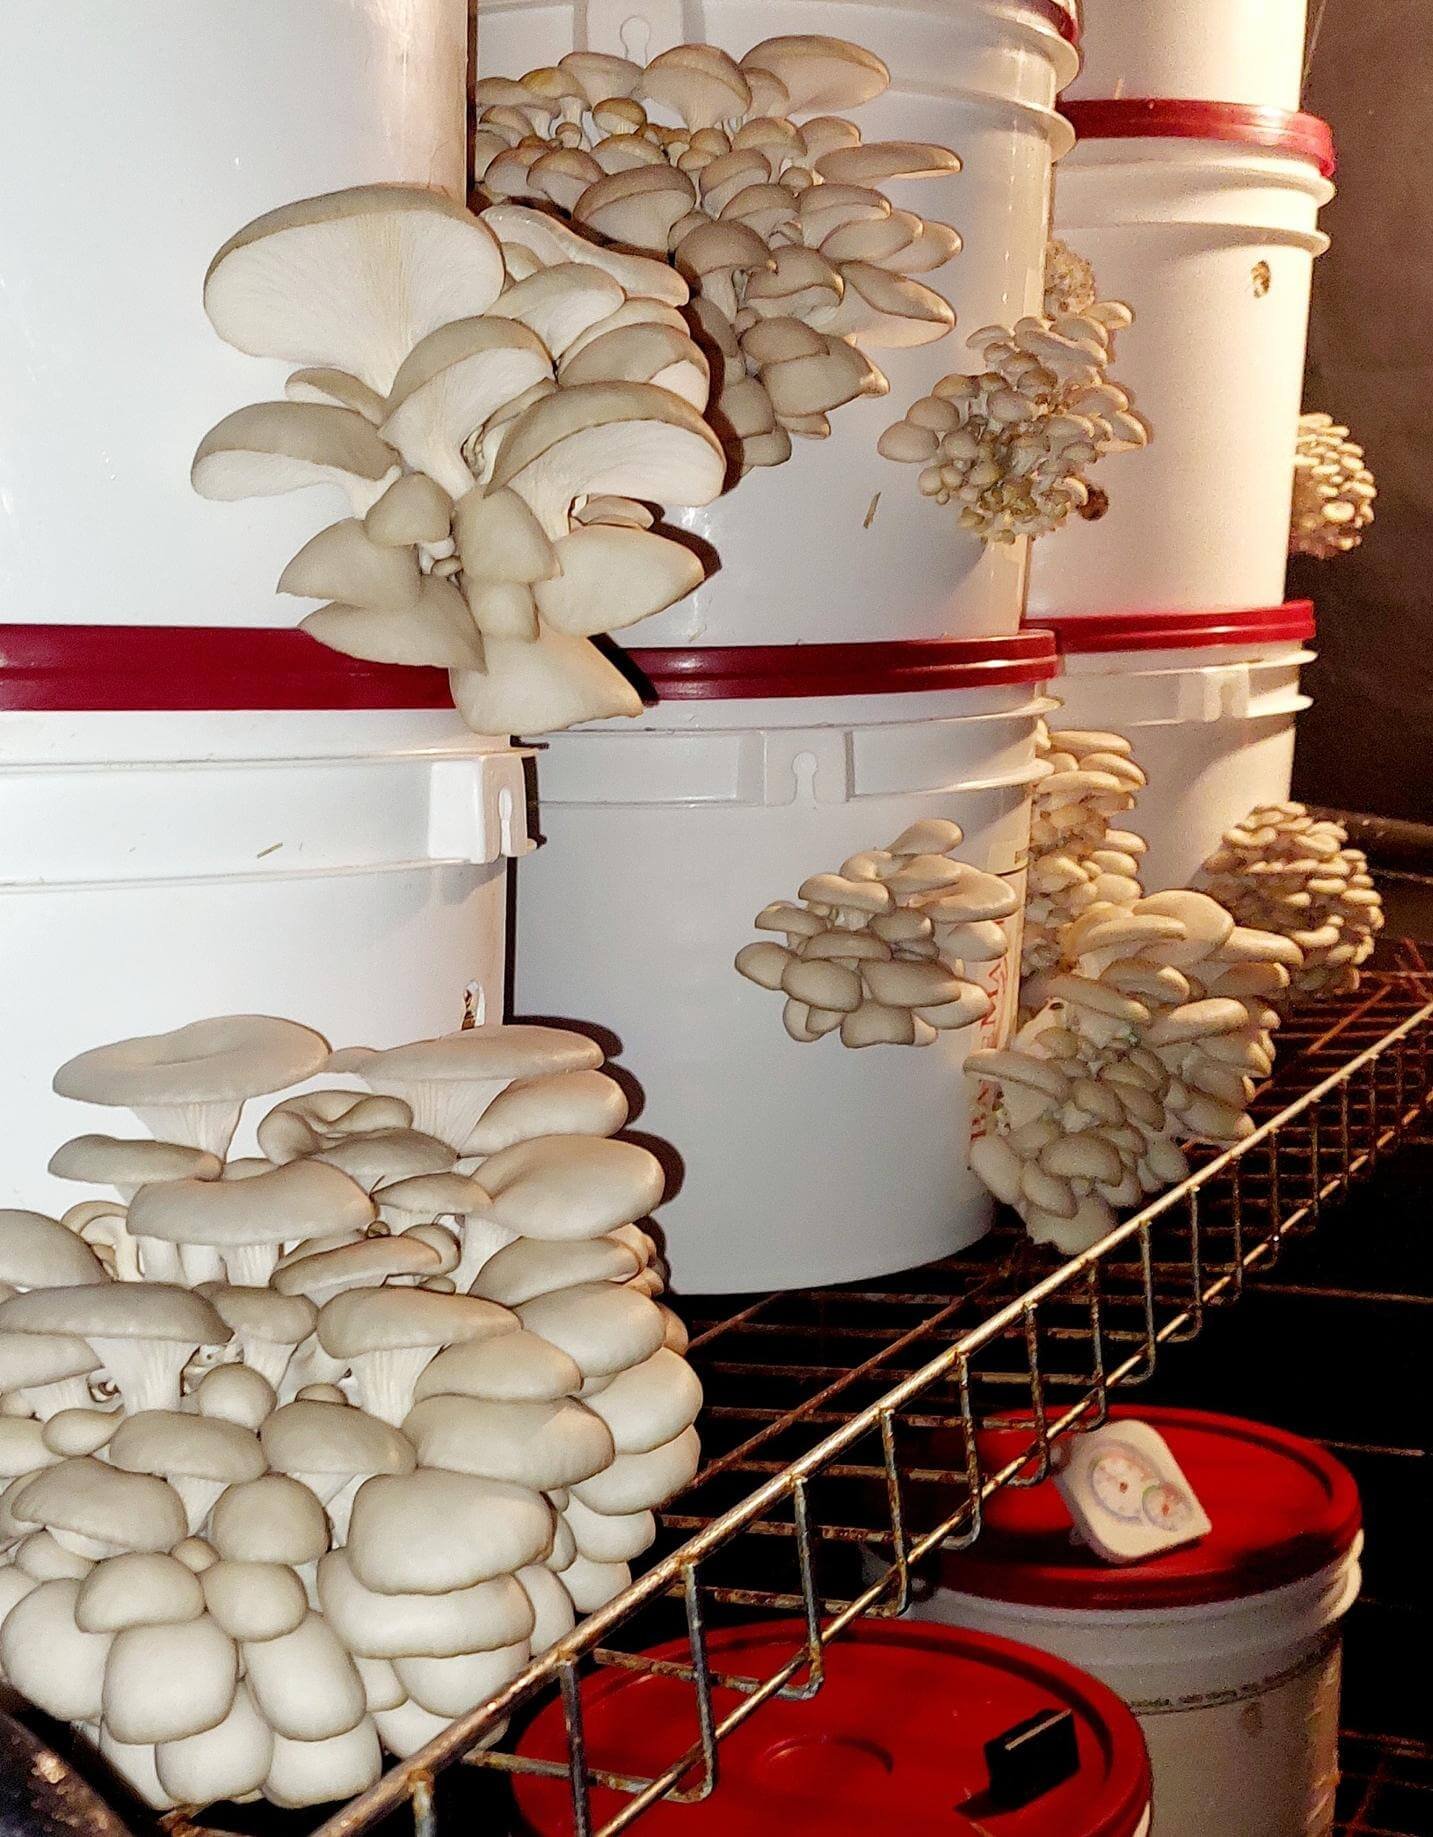
- Space-Saving and Versatile: Ideal for indoor setups like closets or garages, or outdoor shaded areas. Buckets stack neatly and allow side-fruiting for easy harvesting.
- High Yields and Nutrition: Oyster mushrooms, a top choice, grow quickly and are packed with protein, vitamins, and antioxidants. Multiple flushes (2-4 per bucket) mean ongoing harvests.
- Sustainability: Use recycled food-grade buckets and natural substrates like straw. It’s a low-water, low-energy method compared to commercial farming.
This approach minimizes contamination risks through pasteurization and sealed incubation, making it reliable for year-round production. Plus, it’s eco-friendly—mushrooms break down organic waste, promoting a circular economy in your home.
Best Types of Mushrooms for Bucket Cultivation
Not all mushrooms thrive in buckets, but side-fruiting species that grow horizontally from trees or stumps are ideal. These “bucket-friendly” varieties colonize quickly on simple substrates and fruit through drilled holes. Based on expert recommendations, here’s a breakdown:
| Mushroom TypeIdeal | Ideal Substrate | Colonization Time | Optimal Temp (°F) | Yield per Bucket (lbs) |
| Blue Oyster | Straw | 10-14 days | 50-75 | 2-3 |
| Pink Oyster | Straw/Wood | 10-14 days | 60-80 | 1.5-2.5 |
| Lion’s Mane | Hardwood Pellets | 1-2 weeks | 60-75 | 1-2 |
| Shiitake | Hardwood Sawdust | 2-3 weeks | 55-75 | 1-2 |
Other Options: King Trumpet (Eryngii) for meaty stems on sawdust; Chestnut for nutty flavor. Avoid gourmet types like morels, which require complex outdoor conditions.
Step-by-Step Guide to Growing Mushrooms in Plastic Buckets
Step 1: Prepare Your Bucket
- Wash the bucket and lid with hot soapy water, rinse thoroughly, and disinfect with 70% isopropyl alcohol.
- Drill 1/2-inch holes around the sides: Space them 4-6 inches apart in rows, starting 2-3 inches from the top (for fruiting) and bottom (for drainage).
- Aim for 20-30 holes total—diamond pattern works best.
- Cover all holes with micropore tape to seal during incubation. Label the bucket with date, strain, and substrate.
Step 2: Pasteurize the Substrate
Pasteurization kills competing molds and bacteria without full sterilization.
- Chop straw to 2-inch pieces if needed.
- In a large bin, mix water with 0.2% hydrated lime (e.g., 2g per liter) until pH reaches 11-13 (test with meter). Wear gloves and a mask—lime is caustic.
- Place substrate in a mesh bag, submerge in the lime water, weigh down (e.g., with a brick), and soak for 16-20 hours.
- Drain for 1-2 hours until “field capacity”: Squeeze a handful—only a few drops should release. Let cool to room temp (overnight if needed). Alternative: Hot water pasteurization—submerge in 140-170°F water for 1 hour, then drain and cool.
Step 3: Inoculate the Bucket (Mix Spawn and Substrate)
- Disinfect your workspace and hands/tools.
- Layer the bucket: Start with 1-2 inches of substrate, sprinkle 10-20% spawn evenly (e.g., 5-10% for standard, up to 40% for faster growth like Lion’s Mane), then more substrate. Repeat until full, packing firmly but not tightly (leave air pockets for mycelium breathing).
- Tap to settle, add lid loosely, and store any extra mix in small bags for bonus grows.
Step 4: Incubate for Colonization
- Place in a dark, warm spot (65-75°F/18-24°C for oysters; adjust for variety).
- Check after 5 days: White, cottony mycelium should appear. Full colonization takes 10-21 days— the bucket will feel warm and smell sweet (like anise for oysters).
- Avoid opening often to prevent contamination. If using a grow tent, loosely cover for humidity.
Step 5: Initiate Fruiting
- Once fully colonized (white throughout), remove tape from holes.
- Move to a shady, humid area (50-80°F/10-27°C, 80-90% humidity). Indoors: Use a misted closet; outdoors: Shaded porch.
- Mist holes 2-3 times daily. Pins (baby mushrooms) form in 7-10 days; full fruits in another week.
Incubation and Fruiting Conditions for Optimal Growth
Success hinges on mimicking nature: Dark, humid, and aerated for incubation; light, fresh air, and moisture for fruiting.
- Incubation: 65-75°F, total darkness, 80-90% humidity. Mycelium generates heat—space buckets 6 inches apart. Duration: 10-21 days. Signs of health: White growth, no foul odors.
- Fruiting: Indirect light (12 hours/day), 50-80°F, high humidity (mist to maintain), and good airflow (fan if indoors). CO2 buildup causes leggy growth—ensure ventilation. For year-round indoor use, use a humidity dome or tent.
Monitor with a hygrometer; oysters tolerate fluctuations better than shiitake.
Harvesting Your Mushrooms: When and How
Timing is crucial—harvest too late, and spores drop, attracting pests.
- When: For oysters, when caps flatten and edges curl up (before spores release as white dust). Lion’s Mane: When spines are 1/4-inch long or if yellowing starts. Typically 10-14 days post-pinning.
- How: Use a sharp knife to cut clusters at the hole’s base. Twist gently for Lion’s Mane. Yield: 1-3 lbs first flush; soak bucket in water overnight for second flush (repeat misting).
- Storage: Refrigerate in paper bags for 5-7 days; cook soon for best flavor. Compost spent substrate or use as garden mulch.
Expect 2-4 flushes per bucket, with decreasing yields.
Conclusion: Start Your Bucket Mushroom Today
Growing mushrooms in plastic buckets is a rewarding, low-effort way to enjoy homegrown fungi. From prepping your bucket to savoring the first harvest, this complete guide equips you for success with oysters, Lion’s Mane, and more.
FAQ
- How long does it take to grow mushrooms in a bucket?
4-6 weeks total, with 10-21 days incubation - Can I reuse the bucket?
Yes, clean thoroughly between grows. - What if I get contamination?
Discard and restart with better sterilization. - Is bucket growing suitable for beginners?
Absolutely—oysters are forgiving and yields are impressive.